Custom Widgets
Unlike Global Widgets and Property Widgets, Custom Widgets are not created automatically. These widgets are designed for users who need a tailored display of reviews, allowing for greater flexibility and control.
Creating a Custom Widget
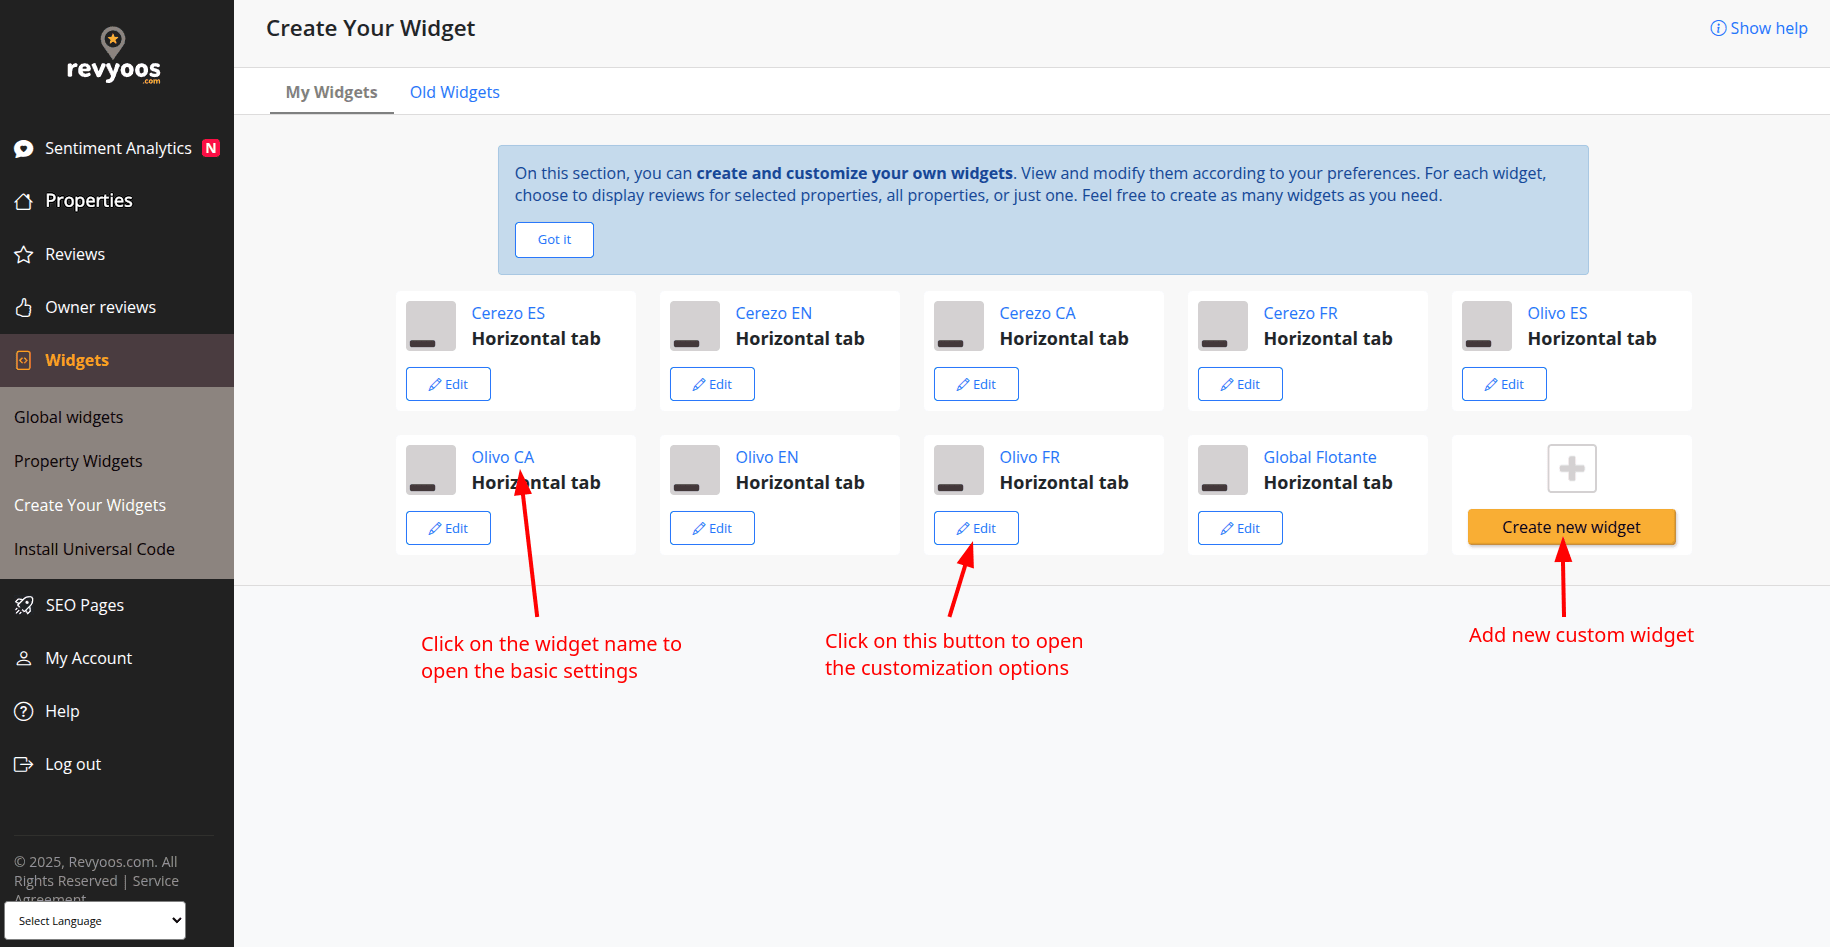
To create a Custom Widget:Click on “Create new widget”.
- Assign a name to the widget.
- Proceed with customization just like any other widget.
Once created, the Custom Widget follows the same structure as other widgets, with three main configuration sections:
Configuring a Custom Widget
Design (Basic settings)
- Modify basic settings such as the title and primary color.
- Custom Widgets can also be renamed or deleted from this page, as they are created by the user.
Customize (Advanced design)
- Select the widget template or type that best fits your needs.
- Adjust advanced styling, templates, and content display settings.
- Edit the contents and style of the widget to match your brand.
- Custom Widgets allow you to choose which properties to include or exclude, offering greater flexibility in displaying reviews.
Extra Configuration: Property Selection
Custom Widgets include an additional configuration option that allows users to select which properties to include or exclude within the widget.
Selection Options:
- Include all properties → Functions like a Global Widget, displaying reviews from all properties.
- Include a single property → Works similarly to a Property Widget, but allows unique styling and layout customization.
- Include multiple properties → Useful for grouping reviews from selected properties, ideal for hotels or shared review sources.
- Exclude specific properties → Enables hiding selected properties for various reasons, such as low ratings, outdated reviews, or different business purposes.
By leveraging these customization options, Custom Widgets provide the highest level of flexibility, ensuring that review displays align perfectly with user needs.
Installation
Custom widgets are installed in the same way as global widgets.
Once the universal code has been added to your website (in the <head> section), you simply need to specify on which pages each widget should appear.
This setup allows you to control the visibility of individual widgets based on the URL or page where you want them to display.
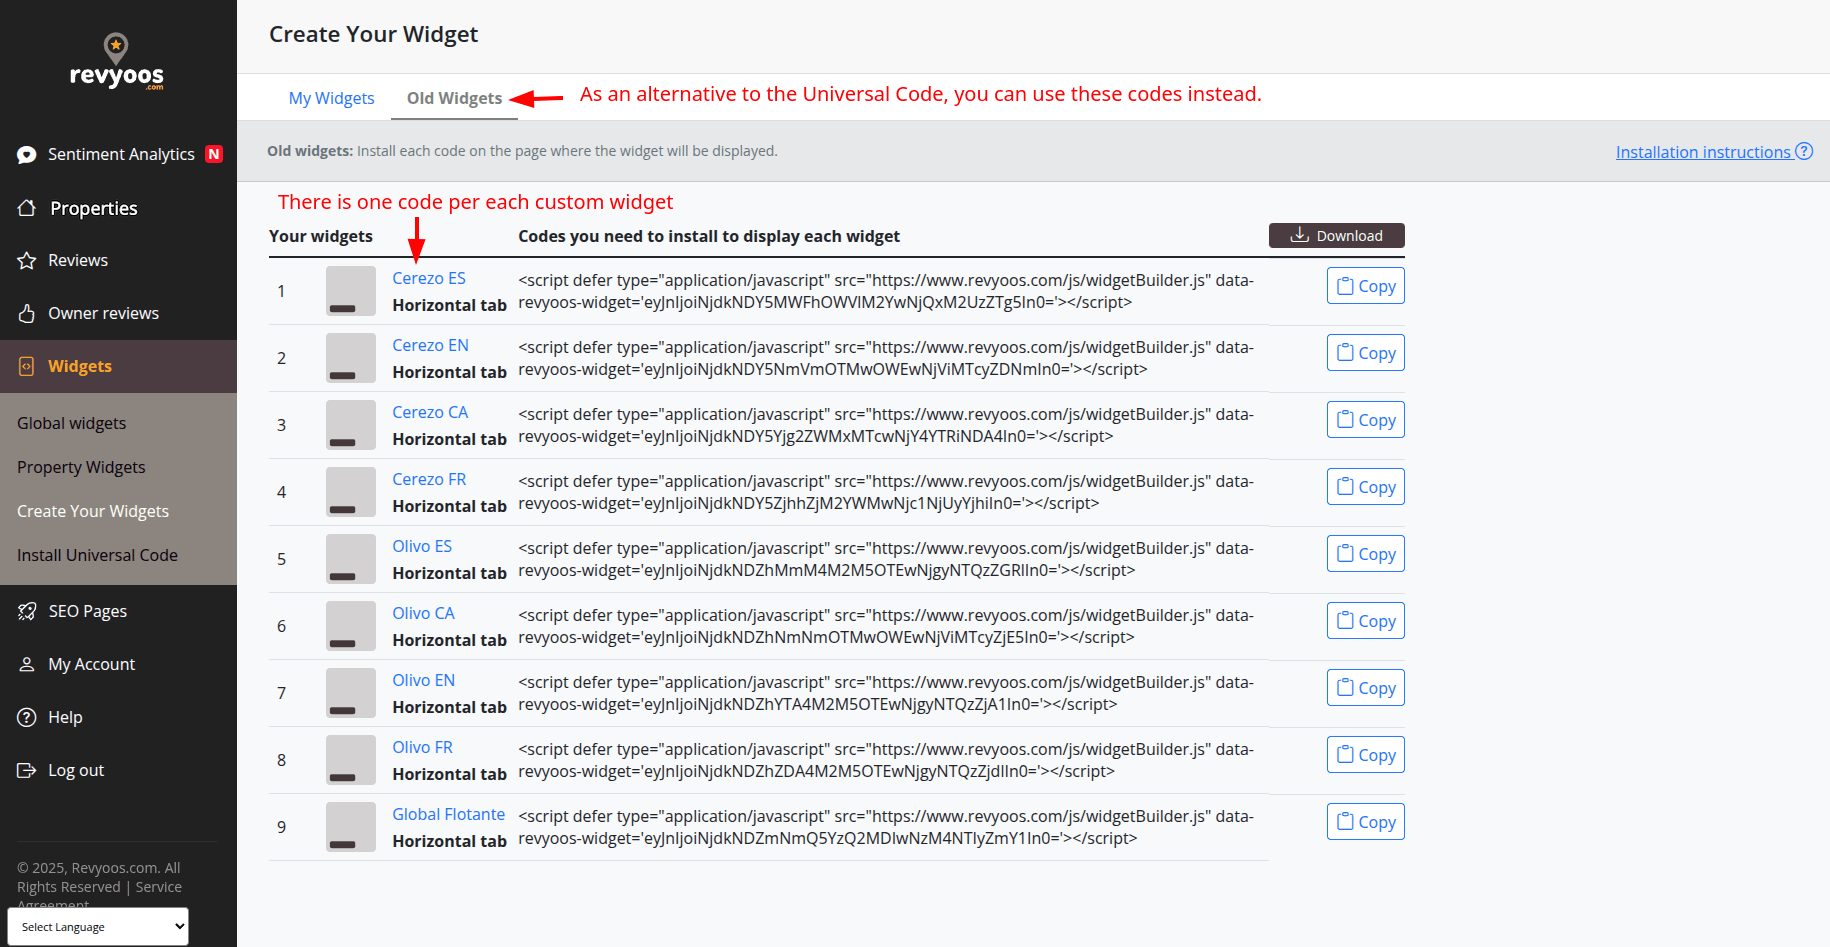
Alternatively, if you’re unable to access or edit the <head> section of your website, you can use the alternative installation codes.
Each custom widget has its own unique alternative code, which you can place directly where you want the widget to appear on the page. This method does not require the universal code and is especially useful for users with limited technical access to their site’s global settings.
Related Articles
Widgets
Explore the articles in this section: Installation: Installing Revyoos Widgets Global Widget Property Widgets Custom Widgets Warnings: Multiple header sections Spammy Structured Markup Penalty Settings: How to Sort Reviews Inside Your Widget ...Property Widgets
Configuring Property Widgets Property Widgets are automatically created for each property in your Revyoos account. The design and settings are applied globally, meaning all property widgets share the same style and configuration. Design Page The ...WordPress Widget Integration
Universal Code: The Key to Displaying Widgets To install Revyoos widgets on a WordPress (or any other) website, you need to insert a unique script called the Universal Code on every page where you want the widgets to appear. Important Considerations ...RentalWise Widget Integration
If you’re using RentalWise as your PMS and you’ve built your website with their website builder, you can easily integrate Revyoos widgets using a special component made for this purpose. However, please note an important detail before you begin: ⚠️ ...Hostfully Widget Integration
? How to Install Revyoos Widgets on Your Hostfully Website Revyoos integrates directly with Hostfully, making it easy to manage and display your vacation rental reviews. By simply connecting your Hostfully account with Revyoos, your reviews will ...